Finally, some time to get back to blogging! How I have missed it! I have had the most amazing time with a Year 3 class. The teacher went on long service leave and we agreed I would plan for the History project. There were 16 boys and 9 girls! I started researching The Australian War Memorial and found to my delight there were memorial boxes you can borrow and use in a class. So off my son and I went in the pouring rain down to Fremantle and as the box weighed 20 kilos my son kindly lifted it into my car! You can have it delivered, I just wanted to make sure it arrived when I needed it! http://www.awm.gov.au/education/schools/memorial-boxes/01-australia-in-the-first-world-war/

This is the box the resources came in. There were two files of photos and posters, clothing and war artifacts.
The children were able to try on the coat and they were really touched when they saw some rough sewing on the shoulder of the jacket where someone had tried to repair a hole.

The children were bothered and quite disturbed about the fact that at the time the helmets were not bullet proof only shrapnel proof.

There was a fascinating tray of original artifacts from the War.

We started with a KWL chart for everyone and a class discussion.

The children found it amazing that so many of their class friends had great grandparents who served in the War. It was an amazing time sharing stories.

The Australian War memorial site also has a PDF of resources to compliment the Memorial box. These pages displayed were for the children to identify an object, find out about the way it was used and to draw a picture of the item. http://www.awm.gov.au/education/box/casestudy/whatisit_prim.pdf

The resource came with gloves for each child to wear as the items were of course old and precious. It was a good learning opportunity for the children to become aware of how important artifacts need to be preserved

I had a mad idea! I wanted to somehow find a way to give the children an opportunity to experience something of the difficulties of living in trenches and going without food! A nigh on impossible task! So I took them outside and they had a pencil, paper and something to lean on. We found a warm but shaded area and I asked them to squash up next to each other and pretend they were in the trenches trying to write a letter to their families. Some of the letters were quite moving. I also set up the room like trenches, well sort of, while they were at sport. I had purchased some unleavened bread and when they came in, I asked them to again squash all together in our ‘trench’ I gave them the dry unleavened bread! They were not impressed and much grumbling and complaining ensued but the point was made!
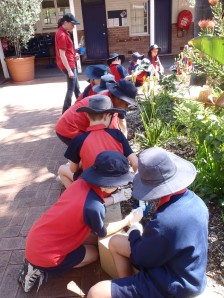
I was delighted to find out the a team of people come out from Bunnings and run workshops with the children. So our lovely lady Helen came out with rosemary bushes, soil improver, gloves and trowels and the children planted the bushes and we said a prayer for all the families who had lost loved ones in the war
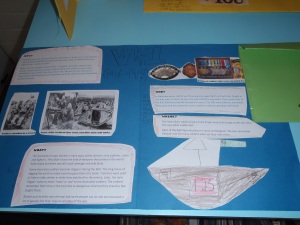
Some of the children’s final projects

Tags: children, World War 1, Year 3